

Creating and deploying a portfolio website using HTML 🎉
Learn to create and deploy a portfolio website for yourself using HTML.


Table of contents
Today, We will be creating a simple HTML website, a portfolio website just using HTML.
I have also uploaded a Youtube video on this
In this video, I have tried to present this blog practically.
So let's get started.
First of all, create a folder for your website on your desktop ( you can make this folder anywhere on your computer ).
I have named it my-portfolio .
Now it's time to create an HTML file into it.
There are two ways to do this:
Open notepad and save the empty file with the name
index.htmlinside that folder.Now you can open this file in chrome or any of your favorite browsers.
And open it with notepad to start writing HTML codes into it.
The second way, I would suggest is to download an IDE, I use VSCode.
IDEs are very helpful for developers (for you). It provides syntax highlighting (your code gets colored) and also informs you if there are any errors. It supports a lot of extensions that you can use to make your developer life easy.
Once you have index.html file on your system opened in the editor and in chrome.
You are ready to write HTML codes.
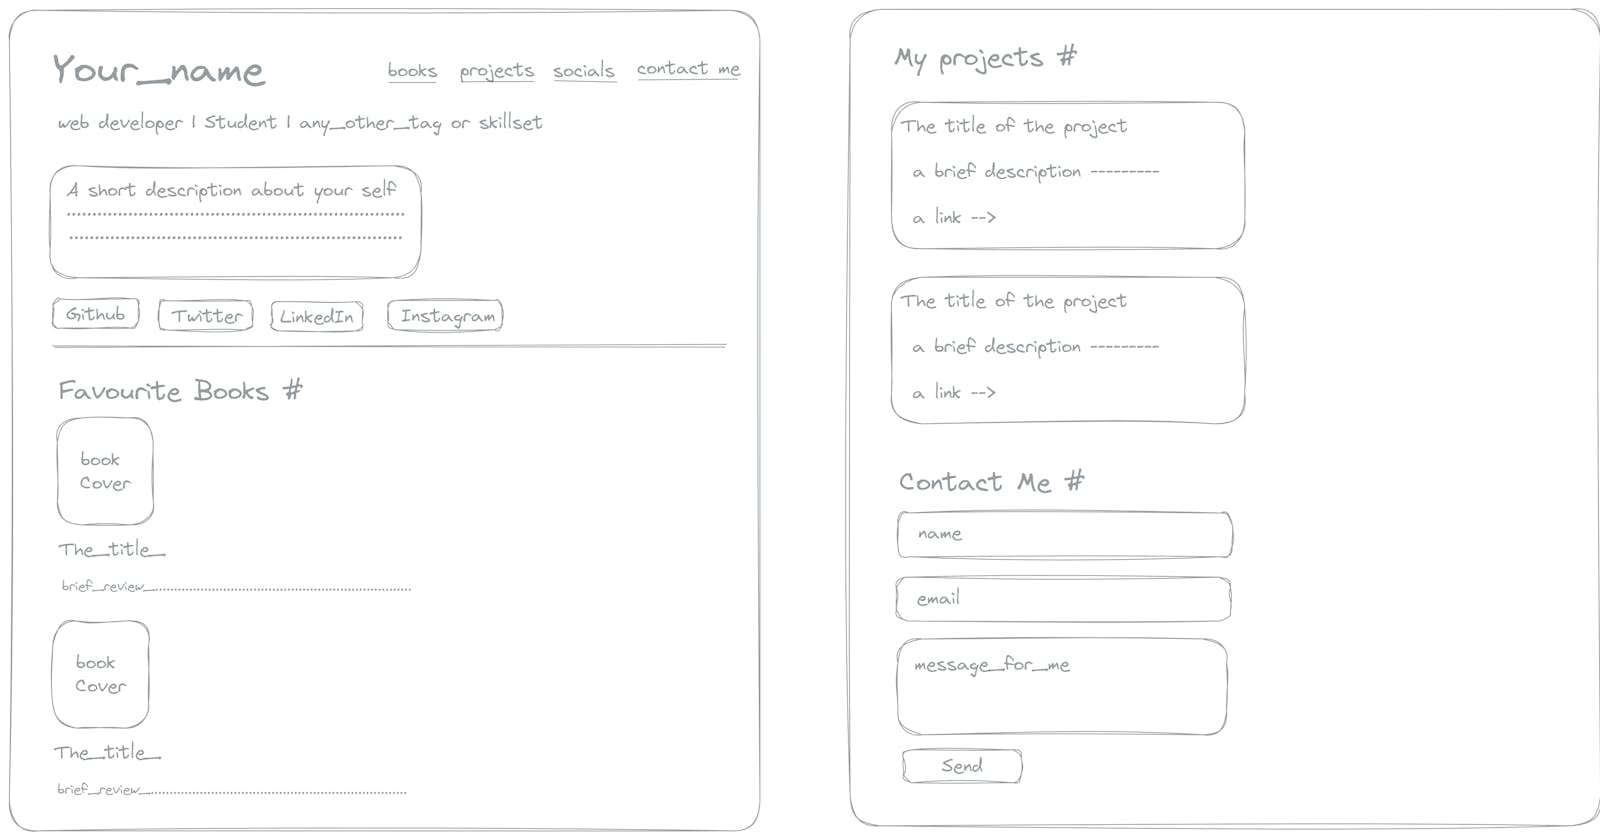
Today, We are going to build this ⬇️
This is what a typical portfolio website looks like.
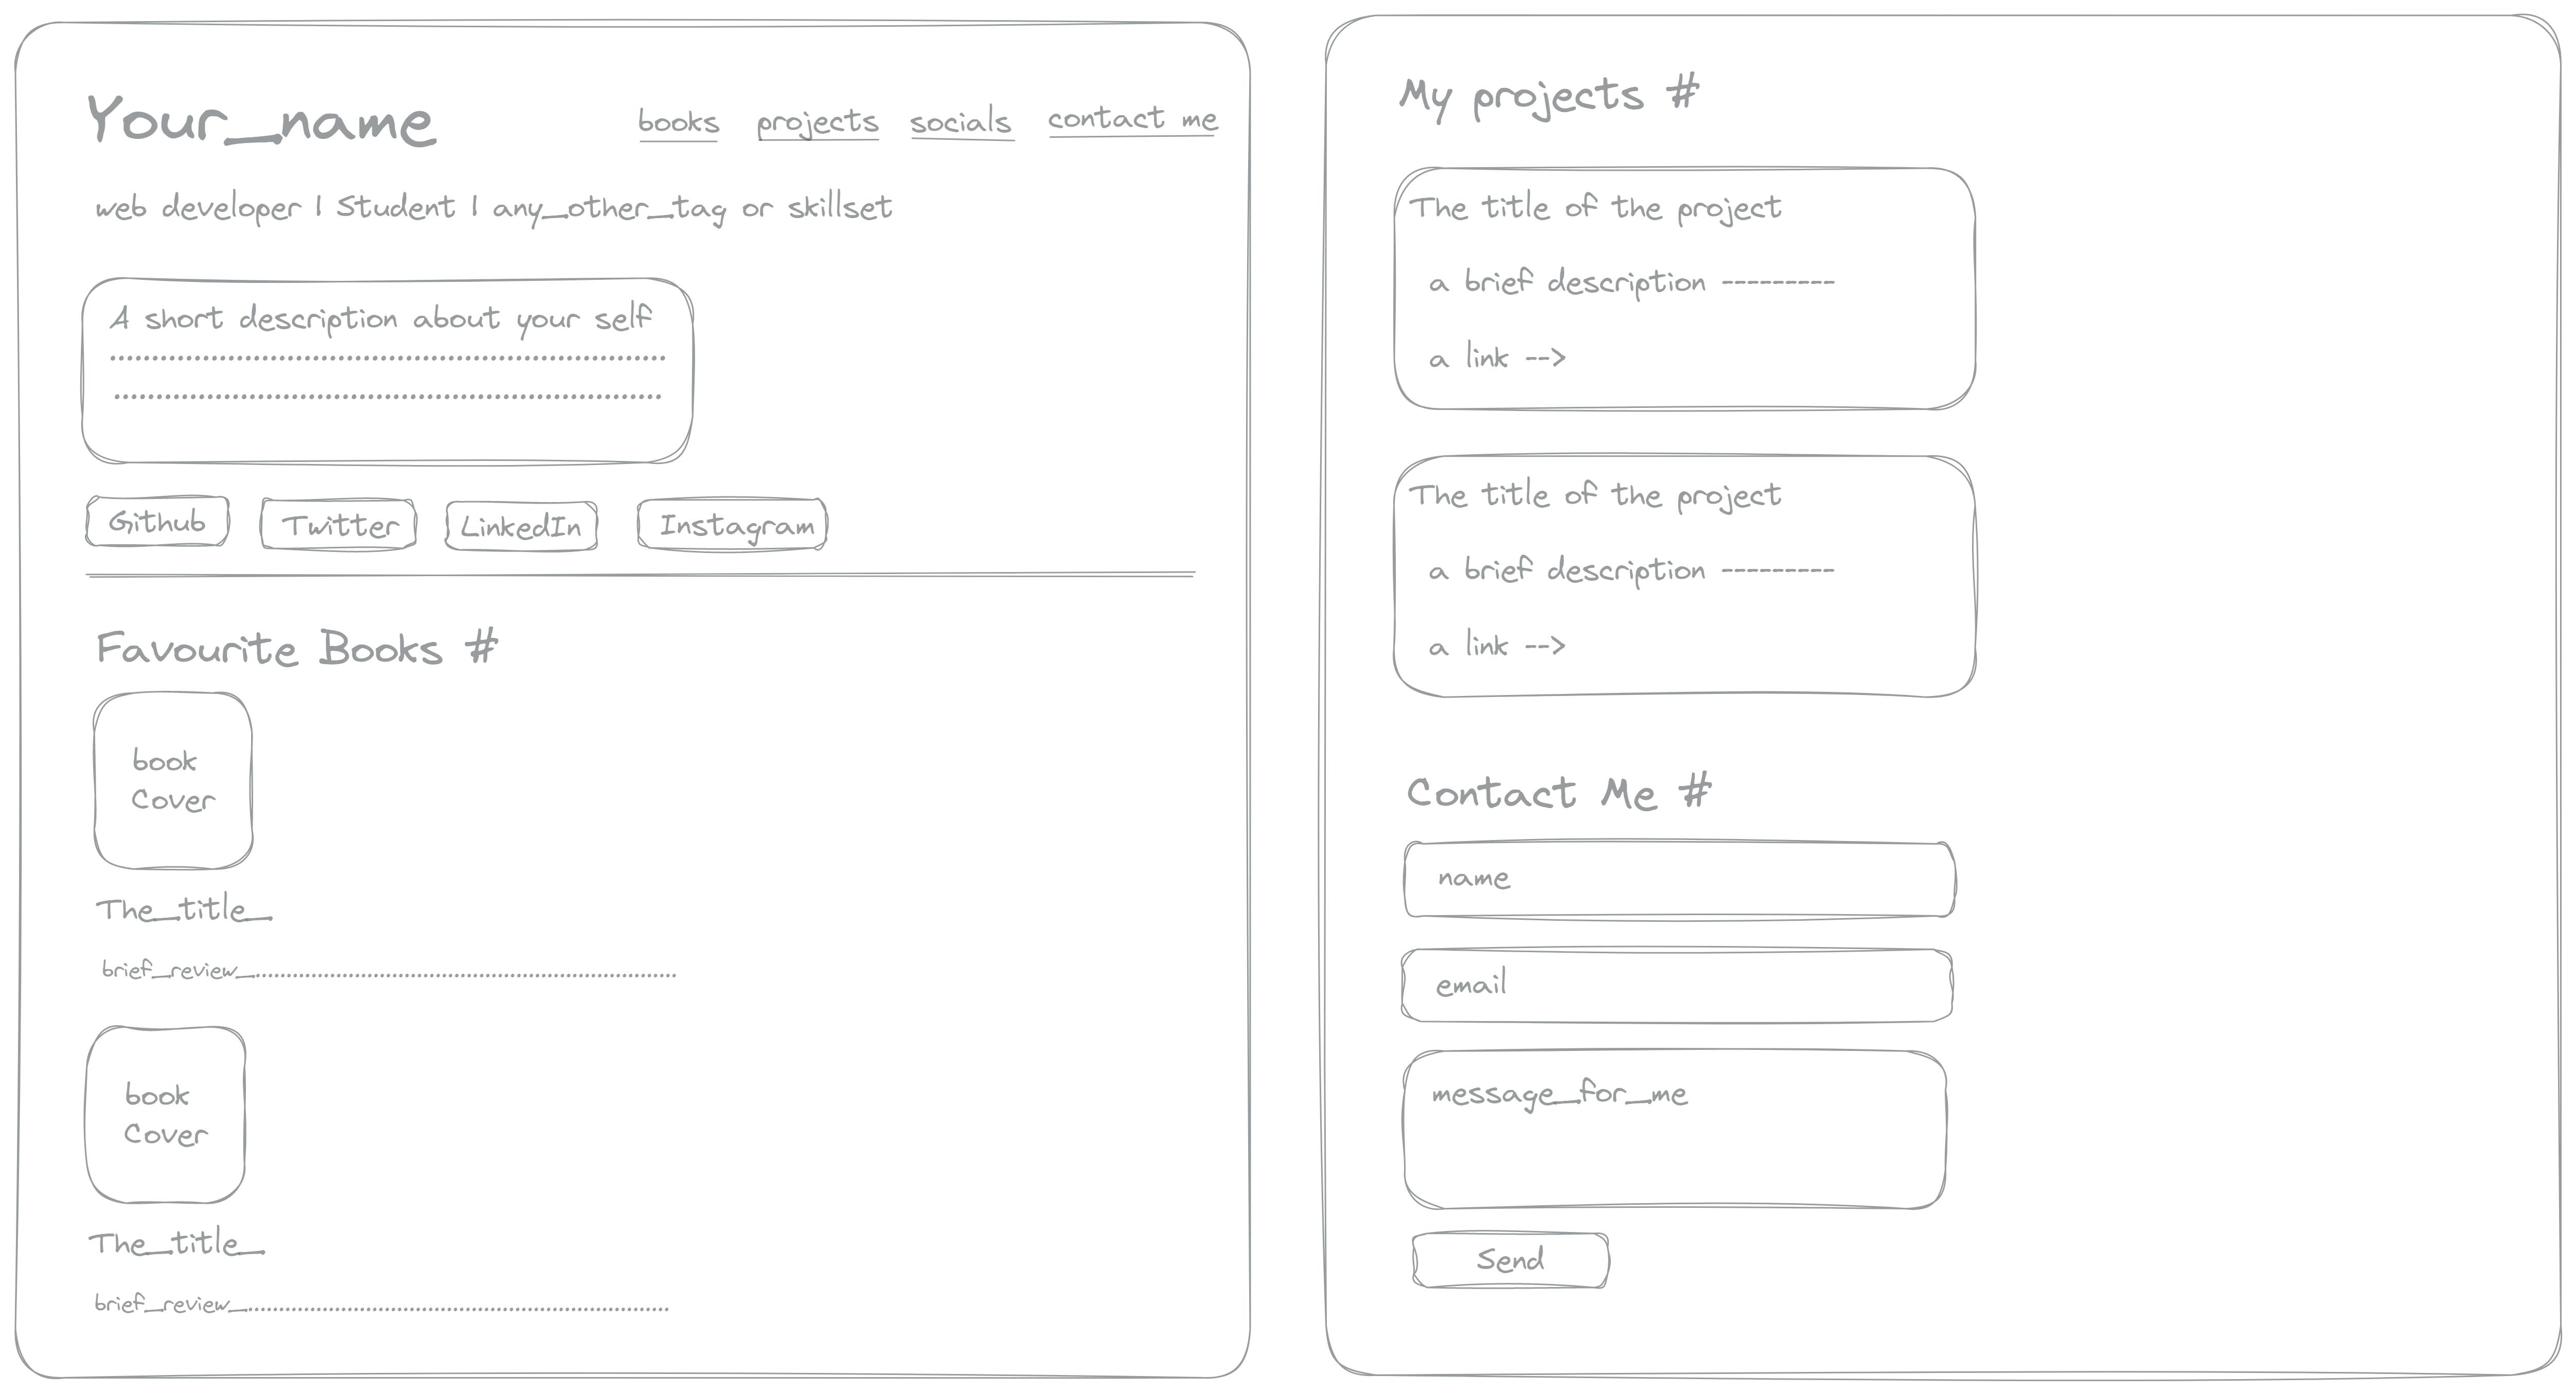
A short description of this website:
It is a single-page website having 4 sections and a navbar at the top.
- Navbar: It has your name, and four links to navigate to different sections of that page.
Introduction
Here you write your skills and a short bio of yourself and at the bottom, it contains your social media handles.
Favorite books
Here, you write a short review about your favorite books and attach a cover photo of them.
Projects
It contains the title, a short description, and the technologies used in the projects. Also a link to that project ( if there is any ).
Contact Form
A contact form where the visitor will write his name, email, and a short message for you. On clicking send it would do nothing for now. ( with only HTML you can't deliver messages).
Let's write the code for it </>
<!DOCTYPE html>
<html lang="en">
<head>
    <meta charset="UTF-8">
    <meta http-equiv="X-UA-Compatible" content="IE=edge">
    <meta name="viewport" content="width=device-width, initial-scale=1.0">
    <title>Ahmad Raza</title>
</head>
<body>

</body>
</html>
I have given it the title of my name.
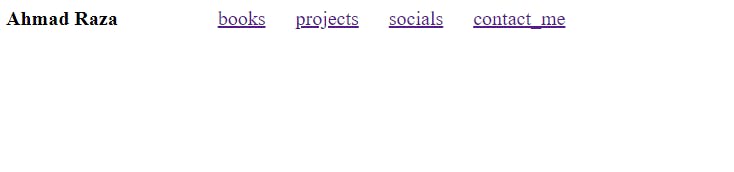
Now let's create the navbar
<!DOCTYPE html>
<html lang="en">
<head>
<meta charset="UTF-8">
<meta http-equiv="X-UA-Compatible" content="IE=edge">
<meta name="viewport" content="width=device-width,
initial-scale=1.0">
<title>Ahmad Raza</title>
</head>
<body>
<nav>
<b>Ahmad Raza</b>       
<a href="#books">books</a>  
<a href="#projects">projects</a>  
<a href="#socials">socials</a>  
<a href="#contact_me">contact_me</a>
</nav>
</body>
</html>
I have used <nav> </nav> tag to create a navbar but it is not mandatory to use nav tag, it's only a convention that we all follow.
Inside that I have used <b> </b> tag, to make the text bold.
And I have used an entity   to give tab spacing.
Then there are four links, their href attributes contains the id of other sections of this page.
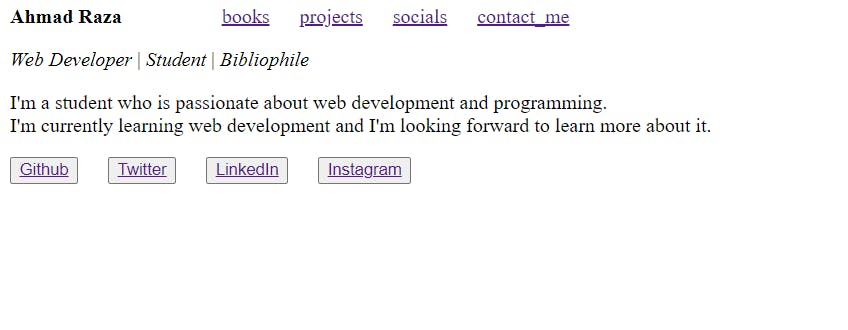
Create the Introduction section 🧑💼
<p>
<i>Web Developer </i> | <i> Student </i> | <i> Bibliophile </i>
</p>
<p>
I'm a student who is passionate about web development
and programming. <br>
I'm currently learning web development and I'm looking forward to
learn more about it.
</p>
<p id="socials">
<button>
<a href="https://www.github.com/razaahmad333" target="_blank">
Github
</a>
</button>  
<button>
<a href="https://www.twitter.com/ahmadraza946_" target="_blank">
Twitter
</a>
</button>  
<button>
<a href="https://www.linkedin.com/in/ahmadrazakhan946/" target="_blank">
LinkedIn
</a>
</button>  
<button>
<a href="https://www.instagram.com/ahmadrazakhan946/" target="_blank">
Instagram
</a>
</button>  
</p>
I have used <i> </i> tag, to make the texts look italic.
For the description, I have used <p> </p> tag and inside that, I have used <br> tag to give line breaks.
For adding social media handles, I have used <a> </a> anchor tag inside <button> </button> tag. You will notice target="_blank" attribute inside anchor tag, it opens the link in a new tab.
Favorite books section 📚
<hr>

<h3 id="books">Favorite Books <a href="#books">#</a> </h3>

<div>
<img src="./images/show_your_work.png" alt="show_your_work">
<h4>Show Your Work</h4>
<p>It's a really hard thing especially for creative people who are
   afraid of showing their work to anyone <br>
   speaking for myself I've always loved drawing but didn't show my
   work to anyone. This book helped me to overcome that fear.
</p>
</div>
<br>

<div>
<img src="./images/the-boy-the-mole.jfif"
     alt="The Boy, The Mole, The Fox and The Horse">
<h4>The Boy, The Mole, The Fox and The Horse</h4>
<p>
    It's such a heartwarming, fuzzy and cosy book. Loved reading it to bits. <br>
    Will recommend it to everyone! Such empathetic lessons, that we can imply in our daily lives. A must read
</p>
</div>
<br>

<div>
<img src="./images/sapiens.webp" alt="Sapiens: A Brief History of Humankind">
<h4>Sapiens: A Brief History of Humankind</h4>
<p>
    It's a book that will make you think. It's a book that will make you question your beliefs. <br>
    It's always good to know about self origin. I will finish this book in min 10 days because it is a very much
    interesting book.
</p>
</div>
At the top, I have added a horizontal line using <hr> tag.
I used a <h3> </h3> tag with an id="books" so that when the books link is clicked in the navbar, the screen scrolls to this section.
I have used <div> </div> tag to contain each book, it is a container tag, and it will be useful when you will apply styling using CSS.
I downloaded three book covers and kept them inside images folder inside my website's folder.
Then, I used <img> tag, to show the book cover.
After that, I used <h4> </h4> tag, to show the title of that book and then used <p> </p> tag for the review of the book.
The preview of the above code:

Let's create projects section 🍱
<hr>
<h3 id="projects">My Projects <a href="#projects">#</a> </h3>

<div>
<h4>A tip Calculator</h4>
<p>
    A tip calculator that calculates the tip amount and the total
    amount to be paid. <br>
</p>
<h5>Techs Used</h5>
<ul>
    <li>
        HTML
    </li>
    <li>
        CSS
    </li>
    <li>
        JavaScript
    </li>
</ul>
<button>
    <a href="https://condescending-mcclintock-5fa5f8.netlify.app/" target="_blank">View Project</a>
</button>
</div>
<br>
<br>

<div>
<h4>
    Time tracking dashboard
</h4>
<p>
    A time tracking dashboard that shows the time spent on
    different projects. <br>
    It shows the time spent on each project and the total
    time spent on all the projects.
</p>
<h5>Techs Used</h5>
<ul>
    <li>
        HTML
    </li>
    <li>
        CSS
    </li>
    <li>
        JavaScript
    </li>
</ul>
<button>
    <a href="https://time-tracking-dashboard-smoky.vercel.app/" target="_blank">View Project</a>
</button>
</div>
<br>
<br>

<div>
<h4>
    Any_other_project
</h4>
<p>
    I worked on this project in collaboration with my friend. <br>
    It's a website that shows the weather of different cities. <br>
</p>
<h5>Techs Used</h5>
<ul>
    <li>
        HTML
    </li>
    <li>
        CSS
    </li>
    <li>
        JavaScript
    </li>
</ul>
<button>
    <a href="#" target="_blank">View Project</a>
</button>
</div>
Everything I have used here is explained.
I have used <ul> </ul> tag to show the list of techs used.
The preview of the above code:

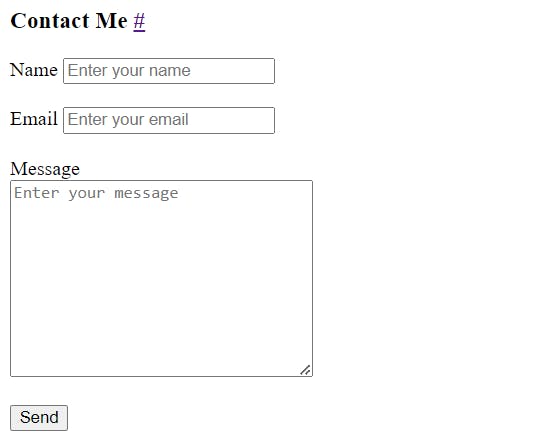
Now, it's time to create Contact Form 📃
<hr>
<h3 id="contact_me">Contact Me <a href="#contact_me">#</a> </h3>

<form>
    <label for="name">Name</label>
    <input type="text" name="name" id="name"
           placeholder="Enter your name" required>
    <br>
    <br>
    <label for="email">Email</label>
    <input type="email" name="email" id="email"
           placeholder="Enter your email" required>
    <br>
    <br>
    <label for="message">Message</label> <br>
    <textarea name="message" id="message" cols="30"
      rows="10" placeholder="Enter your message" required> </textarea>
    <br>
    <br>

    <button type="submit">Send</button>
</form>
I have used <form> </form> tag and input tags to create contact form.
For name, I have used an <input> tag with type="text" and set it to required so that without the name, the user can't submit the form.
For email, I have used <input> tag with type="email" , for checking if the entered information is an email or not.
For message, I have used <textarea> </textarea>, because messages are usually a long paragraph.
For send button, I have used <input> tag with type="submit" , this 'submit' type makes the input element a button.
I have used <label> </label> tags to give labels to the input elements.
For deployment 🚢
- Create an account on Netlify.
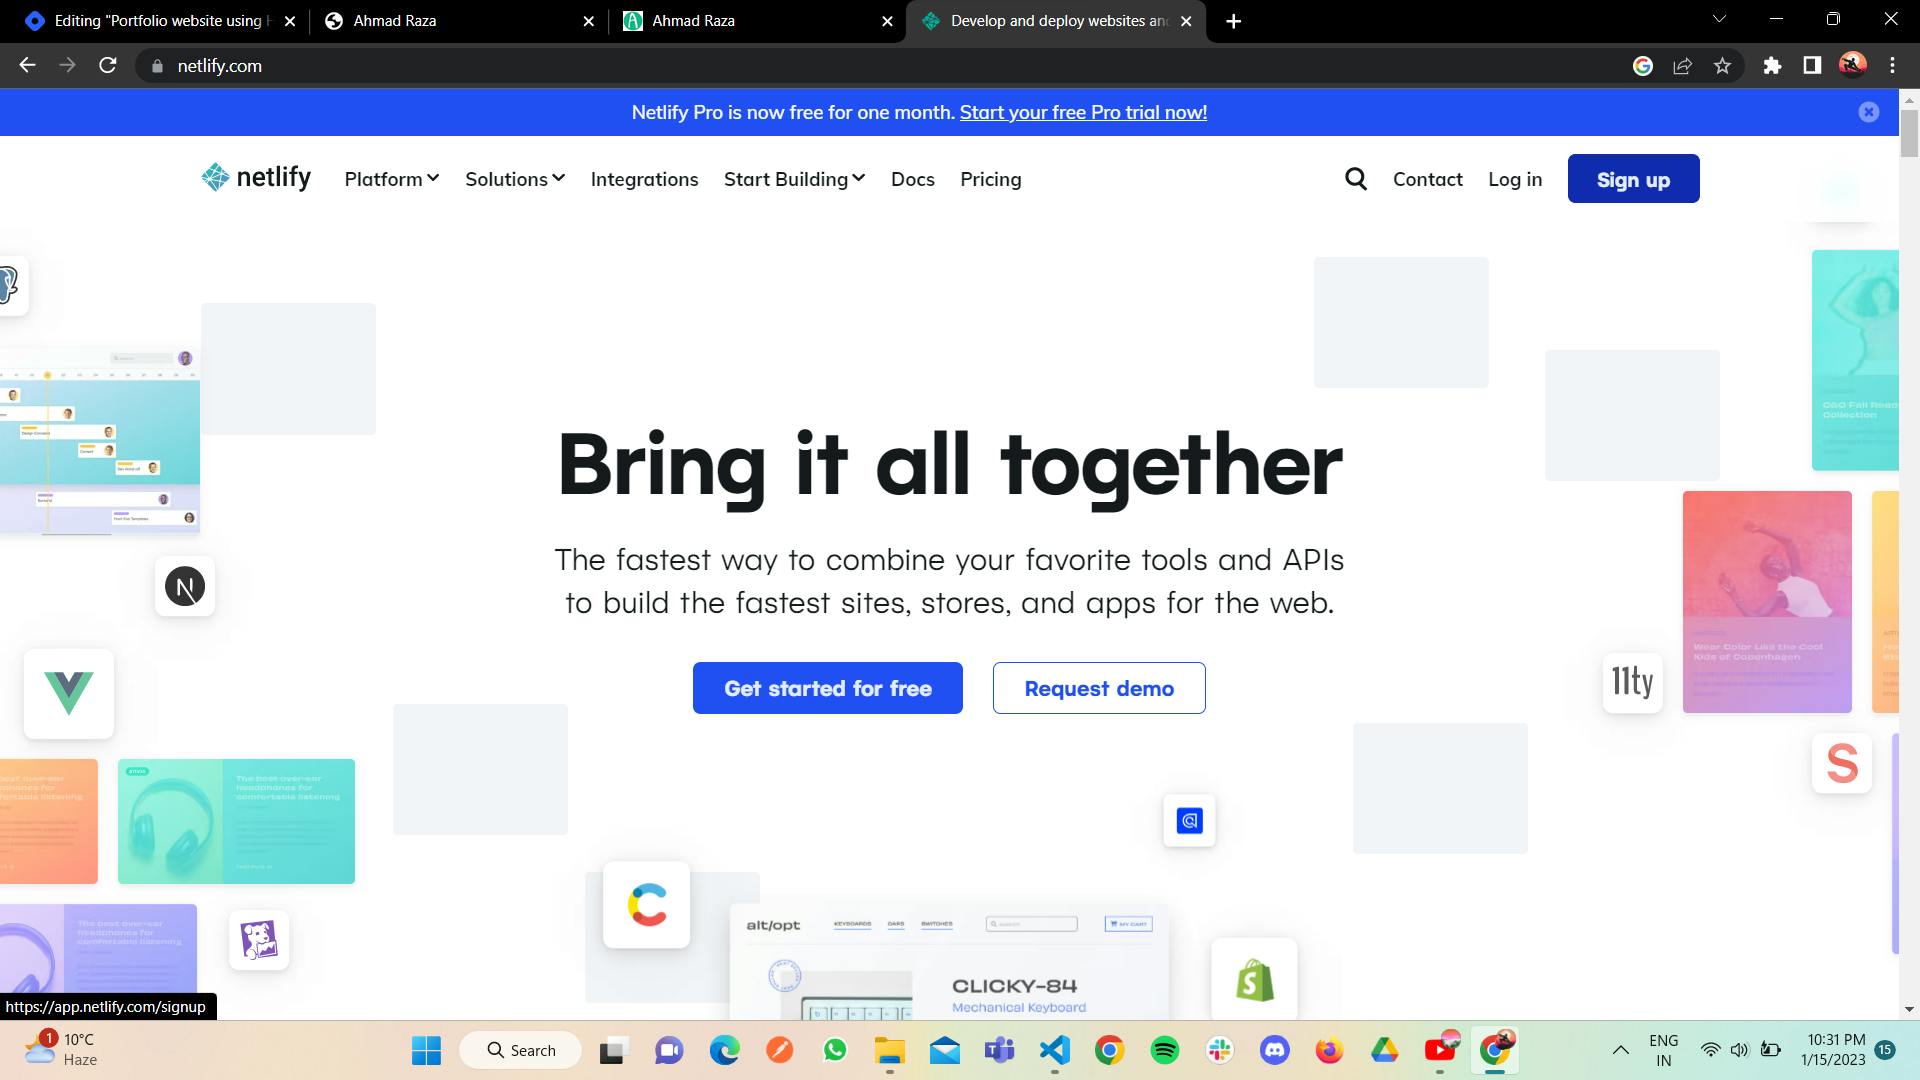
- On successful login, you will see this page
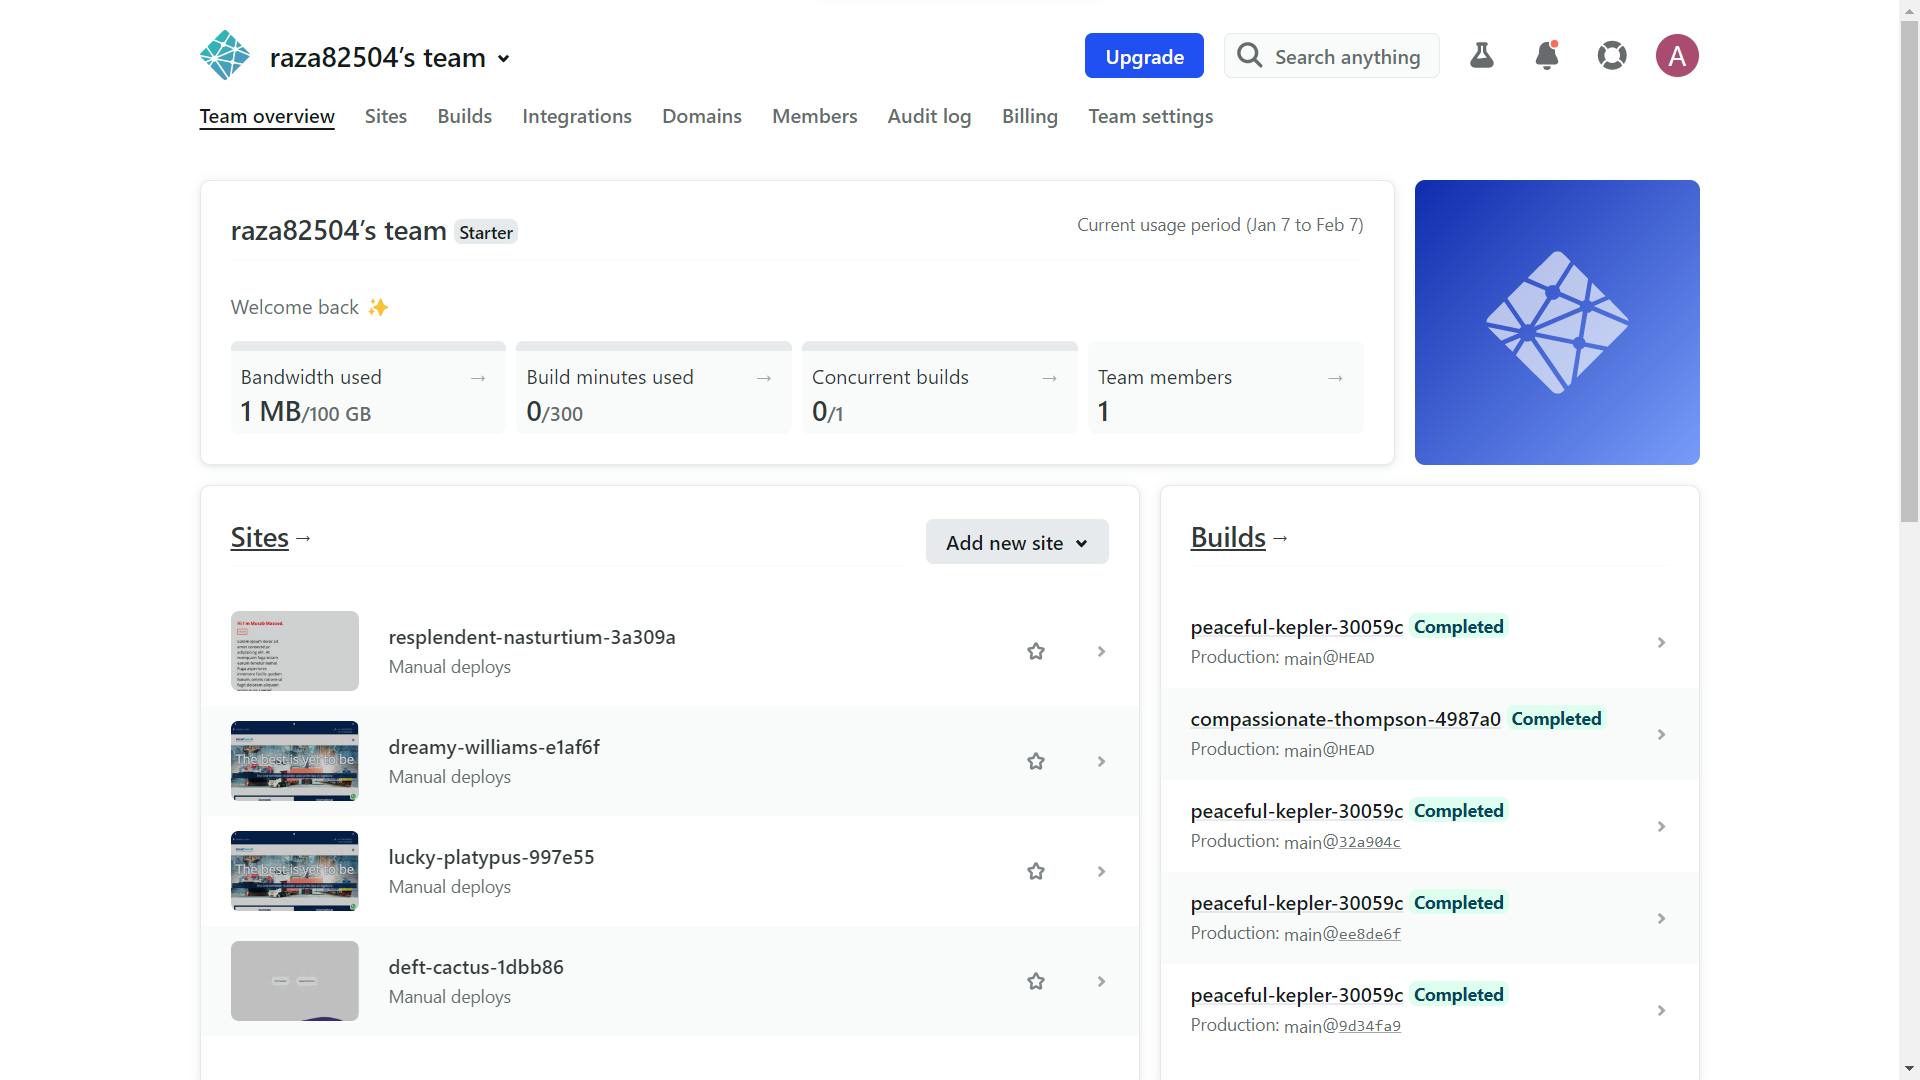
- Head over to
Sitesand scroll the page and you will something like this.
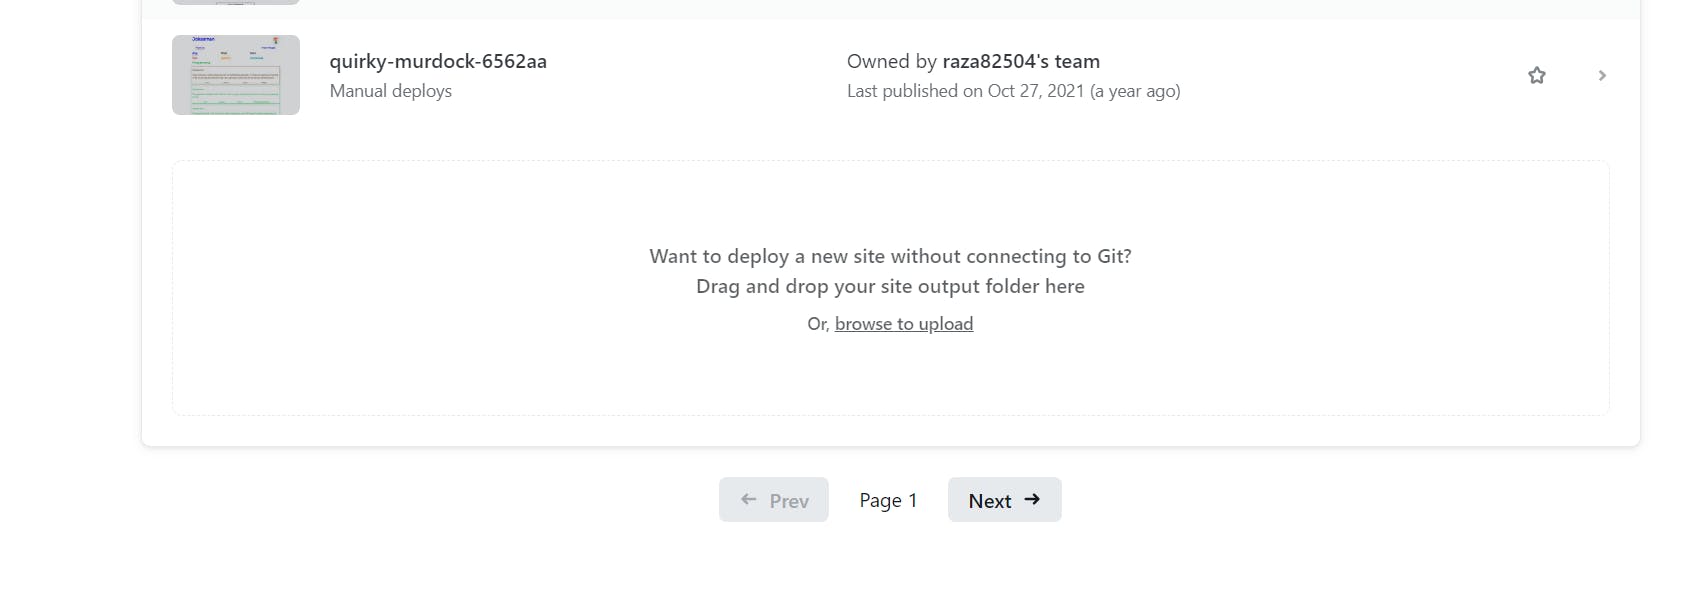
Drag-drop your website folder or click on
browse to uploadto deploy your website.After uploading your folder, wait for a few minutes and then it will give you a link to share with your friends.
Congratulations 🎉, you created your own website and deployed it.