
Forms and Input Elements in HTML 📄
An HTML form contains different kinds of information such as username, password, contact number, email id.

I am a web developer who likes to share his learning with cool people like you.
In real life, forms are used to take information from the user/person. For example forms for job applications and entrance examinations.
This is what form on a paper looks like:
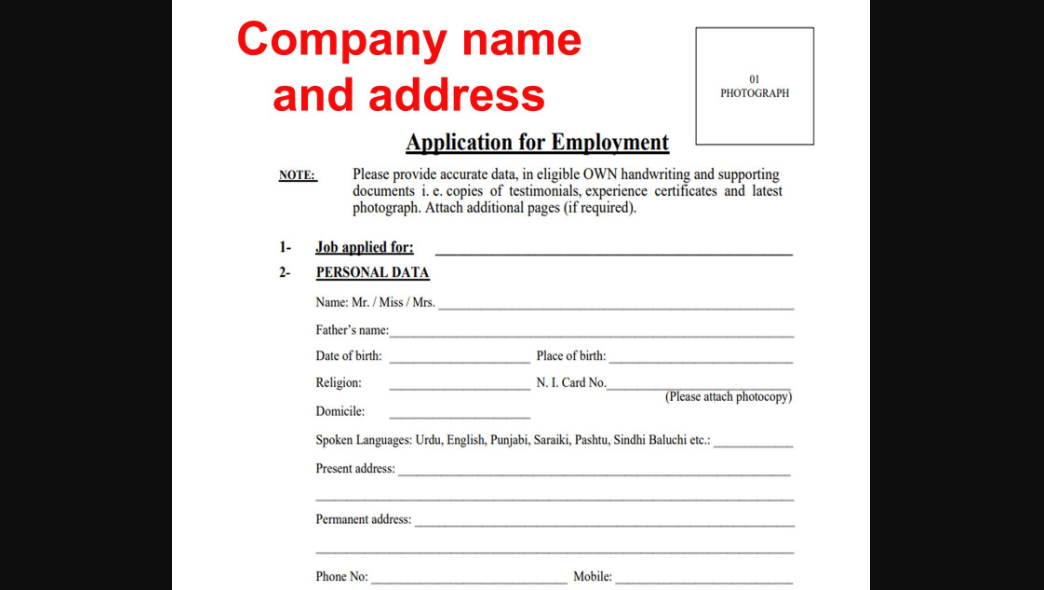
Here, you will notice blanks that need to be filled with appropriate information.
So, for these blanks, there are input elements in HTML.
<input />
input tag is an inline-level tag.
Here is how a form in HTML looks like
Various Input elements - Explained ⚙️
Information can be of various types. For example text, number, email address, password, date, time, etc.
For text 🔤
<input type="text" placeholder="please enter your name" >For number 🔢
<input type="number" placeholder="please enter your age" >For email address 📧
<input type="email" placeholder="please enter your email address" >For password 🔑
<input type="password" placeholder="please enter your password" >⚡password and email are type of texts, so why HTML have different types for them?
The answer :
type
passwordhides the text you enter.type
emailperforms check whether the text is email or not.
For date 📅
<input type="date" placeholder="please enter your dob" >For time ⌚
<input type="time" placeholder="please enter sunrise time" >For file 📁
<input type="file" >For longer texts ( ex: feedback, or remarks) 📃
  <textarea name="textarea" id="textarea" cols="30" rows="10">
  </textarea>
⚡
colsandrowsare used set width and height of the container.
Elements/tags for Options
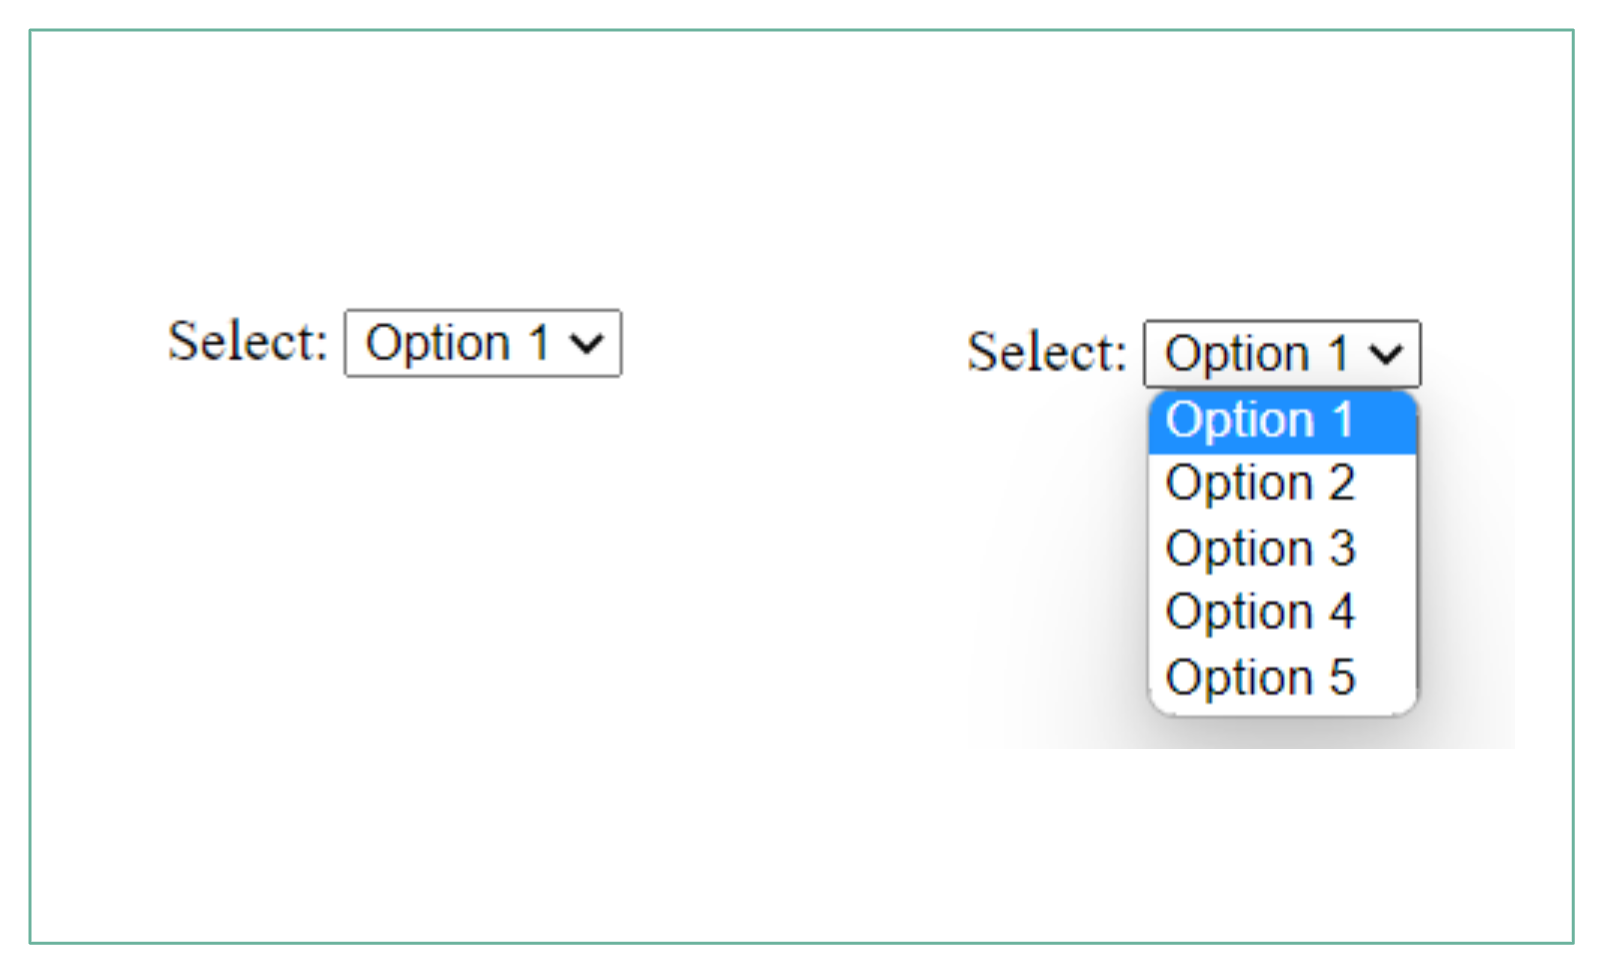
select
use
<select> </select>tag, if you have a lot of options to select from:<label>Select:</label> <select> <option value="option1">Option 1</option> <option value="option2">Option 2</option> <option value="option3">Option 3</option> <option value="option4">Option 4</option> <option value="option5">Option 5</option> </select>The preview:
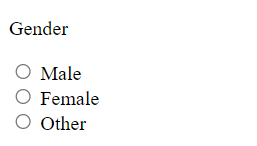
type="radio"
use
inputelement withtype="radio"when you have fewer options and can easily be shown on screen without making the UI ( user-interface/screen) look ugly👍.<p>Gender</p> <input type="radio" name="gender" value="Male"> <label>Male</label> <br> <input type="radio" name="gender" value="Female"> <label>Female</label> <br> <input type="radio" name="gender" value="Other"> <label>Other</label> <br>The preview:
⚡ All these input elements are connected to each other through
nameattribute. That's why you will notice them working as a system.
type="checkbox"
when you have fewer options and you want the user to select multiple options, you can use checkboxes.
  <p>Vehicles</p>

  <input type="checkbox" name="vehicle" value="Bike">
  <label> I have a bike</label><br>

  <input type="checkbox" name="vehicle" value="Car">
  <label> I have a car</label><br>

  <input type="checkbox" name="vehicle" value="Boat">
  <label> I have a boat</label><br>
The preview:

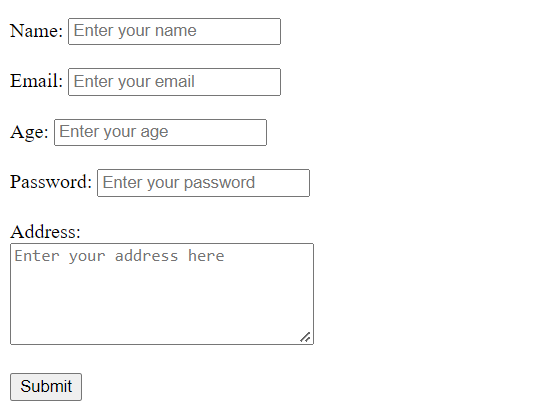
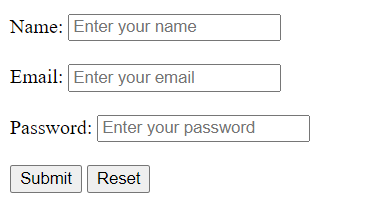
Complete code - for a form 💻
We need to wrap all the input elements inside <form> </form> tag like this
<form>
    <label for="name">Name:</label>
    <input
        type="text"
        id="name"
        name="name"
        placeholder="Enter your name"
        required
    >
    <br>

    <label for="email">Email:</label>
    <input
        type="email"
        id="email"
        name="email"
        placeholder="Enter your email"
        required
    >
    <br>

    <label for="password">Password:</label>
    <input
        type="password"
        id="password"
        name="password"
        placeholder="Enter your password"
        required
    >
    <br>

    <input type="submit" value="Submit">
    <input type="reset" value="Reset">
</form>
The preview:
Attributes explained:
if
forattribute in label tag is same asidattribute in input tag, then on clicking the label text on webpage corresponding input element get focused ( you will see an outline around that input element ).requiredattribute will not allow you to submit the form, if that corresponding input element is not filled.placeholderattribute is used to show helper message to the user.nameattribute is used by backend developers to identify the information.type="submit"creates a button withvalueas its label. Form get submitted when this button is clicked.type="reset"also creates a button withvalueas its label. All the value is reset when this button is clicked.
Read more about Forms - Official Docs
Why and how we use forms - a technical dive 🏊
Form is used to take information from the user.
The steps are:
Creating a form using HTML
Handling the form submission (when submit button is clicked) using javascript.
data is sent to the backend.
In the backend, we validate the data to determine if it is correct or not,
we send back errors to the frontend ( on the webpage ) if there are any
if the data is all correct, we store it in the database and send a success message to the frontend
and the frontend shows the user a congratulations message
🚩 We will be learning more about forms and data in JAVASCRIPT.
⚡ There are no hard and fast rules in design. Observe everything and design your own way through it.
Exercises 🏌️
Here are some free and worth practicing exercises on w3schools.
Source codes
Download the source code of this blog
Check out the source code on GitHub.
Preview the output of this blog.
In the next blog, I will be making a simple project using HTML5 to summarize this whole blog-series.


